
 By
By  December 14, 2023


How Long Does Plastering Take to Dry Fully?
Delays, wasted time, or surface failure after a refurbishment or property transaction nearly always trace back to one neglected question: When is plaster truly dry—and what happens if you misjudge it? If you’re managing a project, preparing a property for market, or protecting your long-term investment, drying times aren’t just a basic fact—they’re a linchpin for future value, compliance, and buyer or tenant confidence. The cost of getting it right is measured in peace of mind; getting it wrong can mean rework, reputation risk, or compliance traps.
What Are the Correct Timelines for Drying Plaster?
Most guides toss out “five days” or “two weeks” as a rule of thumb. Relying on those numbers alone could leave your property open to hidden liability.
Key Timelines (UK Standard Conditions):
- Skim coat (gypsum): 3–7 days in a warm, ventilated room—add several days for colder, high-humidity periods.
- Backing coat or thick applications: 10–14 days or more depending on area and underlying surface.
- Lime or heritage plasters: 21–42 days, more if period substrate or underfloor damp is a factor.
- Patch repairs: Usually 5–10 days, based on depth and wall exposure.
| Plaster type | Typical minimum drying time | Add if cold/humid |
|---|---|---|
| Skim (gypsum, <5mm) | 3–7 days | +2–7 days |
| Backing coat, >10mm | 10–14 days | +4–10 days |
| Lime/heritage | 21–42 days | +14+ days |
Industry reality: Surface “looks dry” far sooner than it’s ready for finishing. Best practice requires confirming with both appearance, touch, and, for high-consequence projects, a calibrated moisture metre reading.
If you’re managing compliance, tenancy, or resale, only sign off on decorating when both walls and client are clear on real drying benchmarks. Sussex Damp Experts will document and validate every timeline for your property class and risk profile.
Why Do Environmental and Building Factors Change Drying Rates?
Replaster After Damp Treatment Advisor
- 1Treatment
- 2Condition
- 3Results
Need expert advice on replastering after damp treatment? Our surveyors can assess your walls and recommend the right plaster specification.
Get a Replastering Quote →No two rooms behave alike. If you’re running renovation in a Victorian terrace, a modern flat, or prepping a Georgian cottage for letting, environmental controls are a deciding factor—not an optional afterthought.
Why Environment Trumps Guesswork Every Time
Losses stack up every year from premature surface finishing, especially as modern insulation or air-tightening can slow drying unpredictably. Drying time is not just about a calendar; it’s a function of airflow, temperature, humidity and wall construction.
Building or Room Variables Impacting Drying
- Solid walls hold moisture far longer: ; cavity construction breathes faster
- North-facing or shaded rooms: need more time and vent adjustment
- Insulation, double or triple glazing, or damp in adjacent rooms: can trap latent moisture
- Basements, window reveals, and bathrooms: can extend drying by up to 40%
| Factor | Extension period | Typical mitigation |
|---|---|---|
| Cold room (<15°C) | +5–10 days | Add gentle heat, monitor RH |
| High humidity (>70%) | +5 days | Run dehumidifier, ventilate |
| Minimal airflow | +3–5 days | Cross-ventilation |
| Heritage substrate | +2–3 weeks | Deferred finishing, log track |
Checklist for optimised room conditions:
- Maintain steady temp (16–21°C)
- Control relative humidity (<65%)
- Encourage gentle, non-direct airflow
- Track changes in cold spots, especially post-insulation
Sussex Damp Experts can survey site conditions and prescribe tailored drying schedules to match not just the surface, but the invisible water content within your substrate.
How to Accurately Measure and Confirm Plaster Dryness

The industrial standard isn’t “looks ready”—it’s measurable, documentable dryness across the whole wall system. If you want certainty for landlords, managing agents, or for your own peace of mind, you’ll need more than guesswork.
Steps to Prove Plaster is Truly Ready
Best practice includes:
1. Visual: Uniform pale colour; absence of dark, shadowed “patches” especially near base or external walls.
2. Touch: Wall should feel at close temperature equilibrium with the room, not cool or clammy.
3. Moisture Metre (WME): Readings below 1% WME (wood moisture equivalent) is the recognised finish threshold.
4. Edge & Corner Checks: Confirm corners—I.e., behind radiators or at skirting boards—for hidden wet spots.
| Checkpoint | How to Validate | Failure signal |
|---|---|---|
| Appearance | Uniform matt pale colour | Blotches, glossy/wet spots |
| Touch | No temperature drop | Patch feels cool or sticky |
| Measurement | <1% WME or manufacturer spec | Readings above threshold |
| Hard-to-reach | Consistent with main surface | Localised persistence |
Tip: DIY owners may stop at colour, but property managers and professionals can’t afford to. Moisture metres (on hire or from pros) pay for themselves in a single non-failed room.
Surface dryness is an illusion—decision certainty comes from the wall’s core, not its skin.
Sussex Damp Experts provide inspection, measurement, and sign-off for complex, regulated, or high-value finishes, delivering protection and proof to keep your assets risk free.
What Can Go Wrong—Dangers of Rushing or Missing the Signs

You may not see the consequences for weeks after decorating. By then, they’re expensive, time-consuming, and risk new compliance or tenant issues.
When Week-Long Waits Lead to Multi-Week Headaches
- Paint fails, peels, or “alligator skins” in random patches:
- Wallpaper detaches, buckles, or accumulates hidden mould:
- Damp odour, potential black mould, or edge decay costs:
- Sale stalls, tenant move-in delayed, or insurance claim denied:
| Mistake | Symptom after finishing | Mitigation |
|---|---|---|
| Early finishing | Peeling/poor adhesion | Wait + track |
| No metre check | Rapid paint/wallpaper failure | Proof step |
| Ignoring corners | Local recurrence | Edge checks |
Red List—When to Halt or Retry
- Plaster colour uneven 7 days after application
- Surface cold or sticky at touch
- No airflow log, or unchecked after heating attempt
Confidence is Earned, Not Assumed
A landlord, asset manager, or renovator with proof of drying protects themselves from disputes and warranty voids. Every dry check you log is a day cut off potential future cost—and a day gained in usable schedule.
Sussex Damp Experts can step in when doubts arise, or when repeated failures threaten project timelines or resale ambitions.
Where Drying Problems Emerge and How to Troubleshoot Them

No checklist or schedule replaces direct, targeted diagnostic action. Pinpointing persistent moisture issues is the pathway from confusion to operational certainty.
Risk Map: Where Most Drying Fails or Slows
- Corners and coves: —ventilation rarely reaches here, and baseboard or trim can mask pooled water.
- Basements and windowless bathrooms: —lack of airflow extends retention, even if readings elsewhere drop.
- Panels behind radiators: —residual moisture, especially after space heating cycles.
- Solid stone or heritage substrates: —naturally slower for capillary action to dissipate.
| Location | Visible/Measurable Issue | Resolution (Action) |
|---|---|---|
| Room corners | Persistent dark spots | Focused airflow, re-inspect |
| Behind radiators | Damp when rest is dry | Partial radiator removal |
| Cellar, basement | Mould, odour, surface decay | Drying logs, pro dehumidify |
| Heritage walls | Cold to touch, colour uneven | Longer schedule, metre proof |
Resolving Drying Blockers
- Log environmental patterns: —note temp, humidity, daily change
- Staggered check-ins: —repeat measurement, never assume trend
- Targeted airflow: —open doors, cross-ventilate, but never blast single-point heat
The difference between ‘good enough’ and ‘guaranteed’ is what you verify on your second walk-through.
Sussex Damp Experts help to identify structural or environmental bottlenecks, ensuring solutions are applied exactly where—and when—they matter most.
How to Safely Accelerate the Plaster Drying Process—Without Compromise
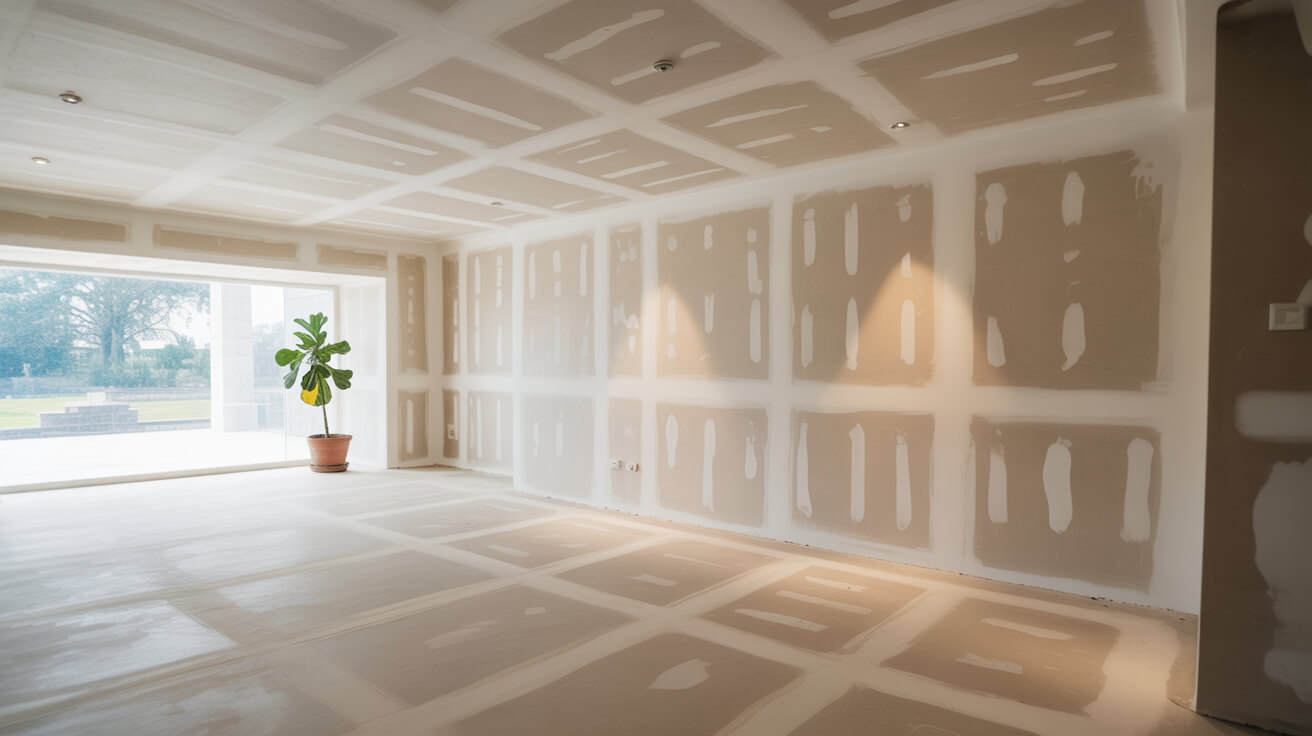
You want your project moving. Most methods for speeding up drying, if misapplied, only trade time saved for later cost in repairs or reputation.
Dos and Don’ts of Acceleration
Do:
- Use indirect, ambient heating to keep room temperature stable
- Run dehumidifiers in high-RH rooms, but never against untested or heritage surfaces
- Ventilate with cross-flows, balance intake and exhaust
Don’t:
- Blast direct heat, especially on heritage or lime-based plaster
- Use industrial dehumidifiers above manufacturer’s settings
- Skip metre checks just to move schedule forward
Pro/DIY Split Table
| Acceleration Method | DIY Suitability | Pro Suitability | Key Risk |
|---|---|---|---|
| Gentle radiator heat | Yes | Yes | Minimal |
| Direct space heater | No | Only limited, logged | Cracking/surface fail |
| Dehumidifier | Yes (monitored) | Yes | Over-drying |
| Cross-ventilation | Yes | Yes | Cold draughts |
Why Compliance and Long-Term Value Depend on How You Accelerate
Anytime speed is prioritised, compliance and warranty need special care. Asset managers, public works, and heritage agents know: every day gained by shortcut is a day risked if checks are skipped.
Sussex Damp Experts generate compliance-aligned environmental logs and complete scheduled inspection for all high-risk or timeline-driven projects.
What Makes Professional Assessment Essential for Compliance and Long-Term Value

The difference between passing a survey or rental inspection and starting over is often a matter of paper trail, not visual finish.
Professional Certification: The Real Value Add
- Protects against tenancy and deposit disputes:
- Unlocks the sale of higher-value properties:
- Enables insurance or compliance event resolution:
- Meets requirements for heritage, leasehold, or public sector handover:
| Certification Type | Protects Against | Stakeholder Relevance |
|---|---|---|
| Metre-backed dryness cert. | Missed latent damp, schedule loss | Landlord, seller, insurer |
| Environmental condition log | Disputed dates, timeline delays | Agent, tenant, buyer |
| Conservation sign-off | Heritage/law compliance incident | Agent, asset manager |
When Your Schedule or Asset Value Is on the Line
Insurers, authorities, and buyers won’t take your word for system readiness. Documentary proof is the professional’s shield, saving time and dispute regardless of project scale.
Sussex Damp Experts has you covered with full-lifecycle, system-calibrated certification—operational credibility, signed and sealed.
Book Your Free Consultation With Sussex Damp Experts Today
Your project is only as secure as your last verified asset. Delayed handovers, failed inspections, or tenant complaints—each can be traced to a missed check or shortcut; each can be neutralised before it disrupts your workflow, reputation, or returns.
Why Take Expert Action Now?
Every property and every wall has its own risk signature. Sussex Damp Experts offers adaptive scheduling, forensic measurement, and fully transparent certification calibrated to your property stage and risk tolerance. You unlock time, certainty, and future-proof handovers that competitors can’t match.
Here’s what to expect when you act:
- Detailed, room-by-room drying schedule and stepwise checklist
- Metre-verified sign-off, with paperwork recognised by insurers, buyers, agents
- Direct support for all compliance, insurance, or sale queries
- Rapid, responsive team for heritage, residential, commercial, and high-risk scenarios
The property stakeholder remembered for success is the one who certifies every step—dry, guaranteed, and future-proof.
Sussex Damp Experts—where evidence, compliance, and timing meet.
Frequently Asked Questions
How Do You Know When Plaster Is Actually Dry—and Why Do Most Failures Happen Here?
Damp proofing and finish timelines miss the mark most when you trust surface cues alone. Pale plaster and a room that “feels” right deceive more often than they deliver; true readiness goes well beyond looks. Dry plaster passes three checks: uniform colour that stays unmistakably pale for two days straight, a touch test that shows no chill on the surface compared to inside walls, and a calibrated moisture metre reading well below 1% WME. Especially after recent water ingress or building moisture control repair, hidden damp within the wall’s depth means a perfect finish may fail in months, not years.
The Real Cost of Guessing: An Owner’s Parable
A Brighton landlord let a painter start work three days after a skim. Days later, dark, irregular “ghosts” seeped through the emulsion. Removal, re-skimming, and lost rental left the owner questioning every shortcut. No schedule or gut feeling replaces a certified moisture measurement, and our team will verify every wall before you take the next irreversible step. Those who build trust their process more than their hunch.
What Environmental Factors Extend Plaster Drying—and How Can You Predict the Unexpected?
Relying on the calendar instead of your room’s reality leads to missed deadlines and budget blowouts. Humidity, temperature, wall mass, gypsum vs lime, and even the shadow of a neighbour’s fence change drydown. The typical three-to-seven-day guideline unravels if a January night drops your airing room to 10°C, or summer humidity hovers at 85%.
Plaster drying in period homes, stone barns, or unventilated apartments is influenced by building type as much as British weather. Inconsistent airflow, blocked vents, or even insulation upgrades will easily double drying predictions, requiring a proactive environment log, not just wishful thinking. Your next project—whether it’s a tenant-ready flat, a sale signing, or insurance claim—can go sideways when external forces outpace your plans.
Rapid Recovery: How a Letting Agent Turned Deadline into Proof
Pressed to hand over five flats in a wet spring, a Sussex agent used a checklist: logged room temperature, daily colour checks, and portable dehumidifier cycles, consulting our drying log protocol. Their show-flat sailed through snagging—while a nearby rival faced insurance retests. Standard operating procedures always outperform hope.
What Is the Best Way to Check Plaster Readiness—For Paint, Paper, or the Next Owner?
Dryness isn’t a guess in compliant projects. It’s an outcome engineered every bit as deliberately as your building’s footprint. Experienced builders and property managers blend three steps: observing that even, chalky finish, checking for cold spots with bare skin at multiple heights, and confirming all readings with a moisture metre (not just the surface, but at wall bases and corners). Failing one of these spells risk—especially in spaces with a history of leaks or non-breathable renders.
For commercial owners, surveyors, and agents, our certified reports turn subjective impressions into regulation-ready evidence—protecting not just the wall, but the contract. Relying only on colour or comfort, you’re trusting the same method that leads to most avoidable reworks and lost guarantees.
Expert Validation: Your Insurance Policy Against Hidden Moisture
Certification isn’t just marketing; it’s protection. Whether preparing for a mortgage inspection or council handover, Sussex Damp Experts’ diagnostic confirms every room is fit for finish and fit for scrutiny, binding value to visible, lasting results.
What Are the Risks of Decorating Too Soon—And How Does One Mistake Spiral Into Many?
Decorating over unfinished plaster is less “a small misstep” and more the silent trigger for a series of preventable disasters. Premature finishing leads to:
- Peeling paint and paper that bubbles or scabs within weeks.
- Stubborn musty smells that resist cleaning.
- Blistering and stains emerging even months later.
- “Ghosting” where new plaster was too wet for a modern coating.
- Failed mortgage/insurance inspections if visible moisture or mould follows.
Landlords, managing agents, and site supervisors risk more than cosmetic annoyance: repeat visits from contractors, claims for loss of earnings, or worse—disputes with tenants and buyers. For heritage and listed buildings, an eager brush can even jeopardise conservation status.
Projected Outcomes Table
| Premature Step | Immediate Symptom | Long-Term Risk |
|---|---|---|
| Painting over damp | Streaks/discolour | Decor redo, tenant disputes |
| Skim too soon | Surface cracking | Full patch removal |
| No metre check | Blister/bubbling | Mould, rental voids |
Smart timing is strategy, not caution. You gain not just a better finish—but a position as a careful custodian, trusted by partners and authorities alike.
Where Are Trouble Spots for Drying—And What Does Targeted Troubleshooting Look Like?
Drying problems don’t distribute equally. Even the most diligent owners miss corner cases: window reveals, chimney breasts, cellars, or walls where vapour barriers or foam filled cavities break the normal cycle. Sometimes, dried patches show in the middle of a wall, but baseboards or upper corners still chill to the touch long after expected.
Diagnosing stuck drying isn’t just about waiting longer. Move obstructions, check airflow, adjust heat patterning, and never trust one instrument or single daily reading. Use layered evidence, cross-sectioned over days. When trend lines stay flat, hidden ingress or a missed substrate upgrade surface—and these are the moments to engage professional help for deeper assessment.
Risk Map
| Location | Most Common Issue | Remediation |
|---|---|---|
| Window reveals | Cold, slow dry | Boost airflow, soft heat |
| Chimney breast | Residual moisture | Open up access, retest |
| Cellars | Ambient humidity | Dehumidify, daily log |
| External corners | Vapour breach | Extended monitoring |
When every day counts and each room has value, tailored troubleshooting ensures timelines (and budgets) are owned—not left to chance.
Can Plaster Drying Be Safely Accelerated—And When Does Speed Compromise Quality?
Expediting your schedule by artificially forcing drying—direct heaters, industrial dehumidifiers, and closed-off rooms—often turns surface “success” into post-occupancy regret. Balance is possible, but pro-grade controls only. Our team stages airflow, manages indirect heating, and logs the climate for each zone, ensuring benchmarks for compliant drying that don’t leave you exposed.
There is a time for speed—but your method must be verified, not guessed. Schedule, document, and always measure outcomes; your record is your safety net when occupants, regulators, or rivals challenge the result. Fast methods done with oversight bring results. Fast minus proof? Risk of costly reversal.
Do’s & Don’ts of Acceleration
- Do: Use low-heat sources, schedule temperature logs, and actively vent.
- Do: Dehumidify only when readings support, not “just in case.”
- Don’t: Seal rooms or blast heat against cold substrate.
- Don’t: Rely on “looks dry” when your handover or warranty are on the line.
Owners and asset managers who make the shift from hope to process become the benchmark, not the risk in the next project review.

