
 By
 November 27, 2025


Misread “Rising Damp”: When Rubble‑Fill Is the Real Moisture Pathway
Rubble‑fill damp becomes likely when surveys show uneven low‑level staining, vertical bands or isolated patches rather than a neat tide mark. When those clues are read alongside the age of the building and its likely wall construction, they often point to moisture tracking through debris or bridging inside the wall instead of simply wicking up evenly from the ground.
Damp surveys are more useful when you treat them as clues, not verdicts.
Many low‑level damp problems that get labelled as “rising damp” in surveys are actually moisture tracking through rubble or debris inside the wall. Specialist case studies from independent damp contractors, such as this discussion of common misdiagnosis of rising damp, describe numerous cases where initial “rising damp” labels were later shown to be cavity debris or bridging problems instead. Once you understand how that mechanism works, the wording in a survey and the photos it includes start to look far less mysterious and much more like a set of clues you can test.
Damp and rubble often go together in older Sussex buildings, but not always in the way buyers are led to believe. A brief survey comment such as “high metre readings to lower walls” or “dampness consistent with rising damp” is not a laboratory result; it is a hypothesis based on a short, mainly visual inspection. In early cavity walls and rubble‑filled constructions, that hypothesis can be wide of the mark, and money gets poured into chemical damp‑proof courses that never touch the real cause.
There is an important distinction between true rising damp and rubble‑fill or bridging damp. Rising damp is moisture drawn up from the ground by capillary action through masonry that is in direct contact with wet soil. It tends to form a relatively even “tide mark” up to around a metre or so above the floor, with the highest moisture levels at the base, reducing gradually with height. Technical guidance on rising damp profiles from specialist manufacturers, such as this white paper on assessing dampness, describes the same kind of even, low‑level banding as typical of true rising damp. Rubble‑fill damp and cavity bridging, by contrast, are usually about rainwater and splashback soaking the outer wall, then finding a solid path across to the inner leaf or core through debris, mortar droppings, insulation or other obstructions that should not be there.
What does survey language really say about rubble‑fill damp?
When a survey mentions “dampness consistent with rising damp,” it is flagging a moisture pattern that might be rising damp, not proving the cause. In buildings with rubble‑filled or early cavity construction, that cautious wording should always be treated as a starting point for further questions rather than a final diagnosis.
Short survey phrases carry more nuance than many people realise, and reading them as if they are definitive test results is where a lot of anxiety starts. A comment such as “dampness consistent with rising damp” really means “the visible symptoms and metre readings could be explained by rising damp, but other causes have not been ruled out.” Consumer damp advice for homebuyers, for example guidance on reading rising damp comments in surveys, makes exactly this point: wording is deliberately cautious and should not be read as laboratory proof. When that line appears in a house with early cavity walls, random stone, or thick solid masonry, it should always prompt questions about how the wall is actually built and whether rubble or debris might be providing a moisture pathway.
Another common pattern is a report that notes “elevated moisture readings to lower walls” with no clear explanation of wall construction and no moisture profile taken up the height of the wall. In a rubble‑filled wall, salts, variations in density and embedded metal can all distort metre readings, especially when a metre designed for timber is pushed into plaster. Treating that single observation as proof of rising damp is like diagnosing a broken leg from a bruised shin without an X‑ray.
A further clue appears when there are one or more past “damp proofing” certificates attached to the paperwork, yet the photos in the new survey show blistered paint, salt bands or crumbling skirtings in the same locations. That combination often points to an earlier misdiagnosis, where injections or waterproof coatings were installed into a wall whose real problem lay in a rubble‑filled core or bridged cavity that was never cleared or even inspected.
Rising damp vs rubble‑fill at a glance
Rising damp usually leaves an even, low‑level tide mark, while rubble‑fill damp tends to create patchy columns, corners and isolated problem zones. Before you can interpret individual clues properly, it helps to hold that simple comparison in mind: classic rising damp follows the physics of capillary action, while rubble‑fill damp follows the path of least resistance through debris, cavities and cores.
Classic rising damp tends to form a reasonably level band, with damage that is most severe close to the floor and tails off gradually with height. Rubble‑fill and bridging damage often looks untidier: irregular patches, columns at corners, or zones that peak at mid‑height or under openings rather than at skirting level. Those differences in pattern tell you a great deal about how water is moving inside the wall.
The table below summarises the main differences many owners in Sussex see in practice.
| Feature | Classic rising damp | Rubble‑fill / cavity bridging |
|---|---|---|
| Internal pattern | Even “tide mark” up to similar height | Irregular patches, columns, corners |
| Height vs floor | Highest at skirting, tails off with height | May peak mid‑height or under openings |
| External risk factors | No DPC, very high ground, chronic saturation | Raised levels, blocked cavities, altered details |
| Typical survey wording | “Consistent with rising damp” | Same wording, but clues often mismatch pattern |
Rubble‑Fill and Cavity Bridging: How These Walls Actually Get Wet

Rubble‑fill damp develops when gaps or cores inside walls become solid moisture bridges between wet outer areas and inner faces that should stay dry. Unlike true rising damp, which depends on direct contact with saturated soil, rubble‑fill and bridging problems are driven by how the wall is assembled and altered over time.
Many late Victorian and Edwardian houses in Sussex were built with early cavity walls: two leaves of brickwork tied together with a narrow air gap that was supposed to break the path of rainwater. Heritage guidance on early cavity walls in traditional buildings notes that this type of construction became common in late‑19th and early‑20th‑century housing across much of the UK, which matches what you see in many Sussex streets. In practice, workmanship was variable. Mortar droppings, pieces of broken brick and other debris often collected at the base of the cavity. Later, cavity wall insulation and alterations to ground levels, paving and render added further ways for that space to become partially filled or bridged. Once you link the age and style of a property with these construction details, it becomes easier to judge how likely rubble‑fill or cavity bridging is as an explanation.
What does “rubble‑filled” really mean in practice?
In practice, a rubble‑filled wall is one where a protective gap has become a solid, moisture‑friendly mass of debris instead of a barrier. The space that should interrupt moisture has turned into a highway between wet outer areas and the inner face. That change is usually invisible from inside the room but very visible in the shape and position of damp marks.
In some older stone or mixed‑construction buildings, the term “rubble‑filled” refers to walls built as two thin outer faces with a loose core of small stones, broken bricks and mortar in between. Conservation guidance on traditional stone and rubble‑core walls, such as this analysis of damp behaviour in stone buildings, describes exactly this kind of construction and the way moisture moves through the loose core. In others, especially early cavity brickwork, it means the cavity itself has become blocked or heavily contaminated with debris. In both cases, the key point is that there is now a continuous or near‑continuous path for moisture to move from a wetter outer zone to an inner one that was supposed to stay drier.
Imagine rain‑soaked outer brickwork above slightly raised ground levels. If the cavity at that point is choked with mortar droppings or rubble sitting directly on the damp‑proof course, water can track through that solid infill, sit in contact with the inner leaf, and then slowly migrate into the plaster. From inside, that may show as a vertical band of damp near a corner or below a window rather than a neat horizontal strip. The damp might even be higher than you would expect from classic rising damp, because it is being fed from the outer wall rather than purely from the ground.
In random stone and flint walls with a rubble core, the picture is messier again. Water can move along unpredictable paths within the core, finding the easiest routes through voids, soft mortar and bedding planes. Instead of a sharp, level tide mark, you may see irregular patching, diagonal spreads or isolated “islands” of damp that do not follow a tidy contour line. That irregularity is itself a clue that capillary rise from the ground is not the only mechanism at work.
How do retrofits and alterations change the moisture path?
Retrofits and later alterations can turn a minor damp risk into a rubble‑fill problem by trapping water or adding solid bridges inside or across the wall. Understanding which changes have been made to your property helps you see how moisture routes may have been re‑drawn since it was first built.
Retrofitted cavity wall insulation, new renders, external wall insulation, and even re‑pointing can all change how water behaves around a rubble‑filled cavity or core. Analysis of cavity wall insulation and damp risk, for example technical commentary on how insulation can create bridging and saturation, shows how these retrofits can unintentionally worsen moisture pathways if they are poorly specified or installed. Insulation materials that were poorly installed, slumped or saturated can form bridges from outer to inner leaf, especially at corners and around openings. Dense cement renders and hard plinths at the base of walls can hold water against the outer surface and direct it into weak points, while also reducing the wall’s ability to dry out between wet periods.
Raising external ground levels with new patios, flower beds or paths brings soil and paving closer to, or even above, the damp‑proof course. In a wall that already has debris at DPC height, that extra wetting can tip a marginal situation into an active damp problem. Recessed or missing weep holes can remove the intended escape route for water in the cavity, meaning that any moisture entering has nowhere to go but sideways across a bridge of rubble.
Three common retrofit changes that worsen rubble‑fill damp
- Raised patios or beds hold wet soil or paving against the wall and overwork the DPC.
- Dense cement plinths and low render trap water and push it towards weak spots and cavities.
- Poorly installed insulation slumps or soaks up water, creating solid bridges between wall leaves.
Seen together, these changes explain why some properties suddenly develop rubble‑fill problems after seemingly unrelated improvement works.
These risks are rarely obvious from a single line in a survey. They are easier to spot when someone walks the site with rubble‑fill and bridging in mind, reads the elevations as a system, and then links those observations back to internal symptoms. That is one of the reasons specialist input is so valuable when you are trying to separate minor maintenance issues from more involved moisture pathways in older Sussex buildings.
Owners and buyers benefit from treating rubble‑fill damp as a system problem, not a single defect. The most successful repair strategies usually combine improved external drainage and ground levels, selective cavity clearance or core investigation, and sympathetic internal finishes that allow any residual moisture to dry rather than trapping it. That is one of the main reasons Sussex Damp Experts favours phased, evidence‑led specifications over any promise of a simple injection or coating that will “sort it once and for all.”
Reading Internal Clues: Moisture Patterns, Heights and Staining
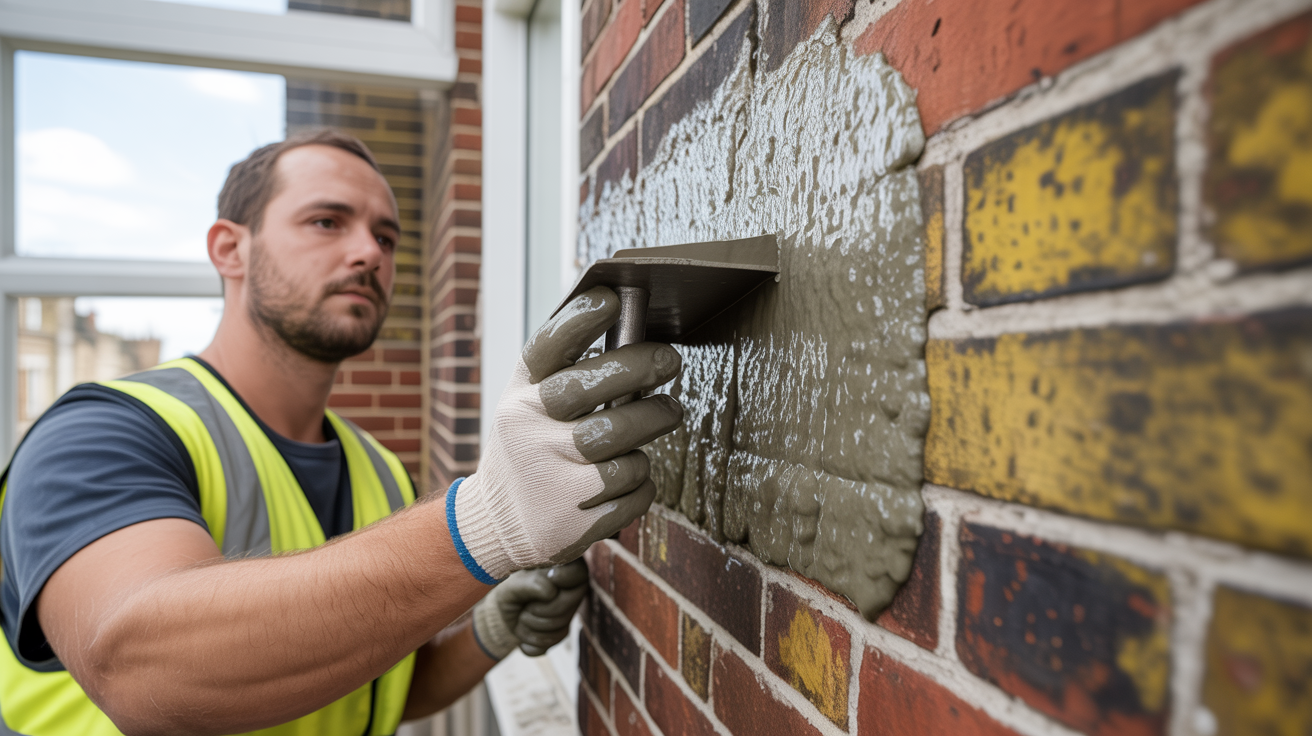
Internal clues point to rubble‑fill damp when staining is irregular, column‑like or patchy rather than forming one neat, level tide mark. By contrast, classic rising damp is more likely when there is a fairly even band at similar height on several walls, with the worst deterioration close to the floor and reducing as you move up.
The inside face of a wall tells a surprisingly detailed story if you know what to look for and are prepared to record it carefully. Height, shape, texture and location of damp marks all help distinguish rubble‑fill and cavity‑bridging damp from classic rising damp, condensation and general penetrating damp, even before a single extra hole is drilled.
Think of each wall as a graph where height above the floor is the vertical axis and distance along the wall is the horizontal one. Rising damp tends to produce a curve that is highest at the skirting and tapers up evenly. Rubble‑fill and bridging more often produce odd spikes, columns and blotches at particular points where the internal face is in contact with a wetter element inside the wall.
What internal patterns suggest rubble‑fill rather than classic rising damp?
Internal patterns suggest rubble‑fill rather than classic rising damp when damage clusters in narrow columns, corners or isolated mid‑height patches instead of forming a smooth low‑level band. You are mainly looking for height differences, odd shapes and localised problem zones that do not behave like a tidy rising damp profile but instead line up with likely internal contact points or external defects.
Start with height. If staining, salt bands or blistered paint rarely go beyond about a metre but form a fairly level, continuous line around the room, classic rising damp remains a plausible explanation, especially in solid walls without cavities. When the pattern is more like narrow vertical columns, irregular patches, or groups of marks focused at corners, under window reveals, or at changes in wall thickness, rubble‑fill or cavity bridging jumps higher up the list of suspects. As described earlier, rubble‑fill tends to show as columns and islands rather than a single, neat tide mark.
Three hallmark internal patterns often seen with rubble‑fill or bridging are:
- Vertical columns of staining or blistering that sit under windows or at corners.
- Isolated “islands” of damage at mid‑height, with relatively sound plaster below.
- Mixed zones where a low‑level salt band is topped by darker, mould‑prone patches.
Guidance on rubble‑filled cavities in traditional buildings, such as this overview of issues with rubble‑filled cavity walls, describes similarly patchy, column‑like internal patterns, which reinforces the value of using these three shapes as a quick mental checklist. Taken together, these patterns usually indicate moisture moving through localised bridges or cores rather than simply rising from the ground.
The feel of the surface also matters. Salt‑laden plaster affected by long‑term moisture from within the wall often feels powdery, friable and hollow when tapped; areas dominated by surface condensation can feel slick, cold and sound more solid underneath. Where rubble‑fill is involved, there may be a mix: a salt band or friable strip at low level, with darker, mould‑prone corners or patches above where warm, moist air is condensing on cooled surfaces that are already held near dew point by the damp core behind.
Metre profiles, when used carefully, can confirm what the eye suggests. Taking readings every 100 millimetres from floor level upwards on both affected and unaffected walls reveals whether the moisture pattern genuinely tails off with height as you would expect from rising damp, or spikes around a particular band that lines up with a suspected bridge. In a rubble‑filled or bridged cavity scenario, it is common to see the highest readings at or just above the level of the internal contact point, not necessarily hard down at the floor.
How can you record internal clues in a way that helps diagnosis?
You help diagnosis when you record internal clues in a structured way, so patterns can be compared between rooms and linked to wall construction and external details. A simple sketch, a handful of photos and a few notes about timing can turn vague impressions into evidence that genuinely guides decisions rather than just feeding worry.
A simple sketch plan and a notebook can turn casual impressions into material a specialist can work with. Mark each room with the walls that show symptoms, noting the approximate height, width and intensity of each area of damp, blistering or salt deposition. Photograph each one head‑on and at an angle that includes floor, wall junctions and skirting, then label the images so they can be matched to the sketch without confusion later.
Steps to capture useful internal clues
- Mark affected walls on a simple plan and note approximate heights and widths of each patch.
- Take paired photos straight on and at an angle that includes floor, skirting and junctions.
- Note textures (powdery, hollow, slick) and any timber decay at skirtings or built‑ins.
- Record when symptoms worsen, such as after storms, cold snaps or changes in heating.
These small habits make your notes far more useful to an independent damp specialist.
Pay particular attention to junctions: where floors meet walls, where chimney breasts step out from the main plane, and where built‑in cupboards or panelling are fixed against external walls. Repeated low‑level staining or decay to skirtings and built‑in joinery in such locations may indicate that moisture from a rubble core or bridged cavity is not only affecting plaster but also the timbers that tie into or sit near the damp zone.
It also helps to note when the damp becomes more obvious. Does it get worse in winter, after prolonged rain, or when the heating pattern changes? A rubble‑filled or bridged cavity taking in wind‑driven rain will often show increased symptoms after storms, whereas purely condensation‑driven issues may be more closely tied to occupancy and ventilation patterns. That timing information is useful later when someone comes to compare your internal notes with external weather exposure and detailing.
All of these internal observations are powerful on their own, but they become far more diagnostic when you set them alongside an understanding of how the external face looks, how the wall was constructed, and what the survey already tells you about materials and alterations. This is where a short call or visit from Sussex Damp Experts can make a noticeable difference: by weighing your internal pattern log against external and construction clues, the likelihood of rubble‑fill damp can often be moved from “vague possibility” to “probable mechanism” or “unlikely here” with much more confidence.
External Evidence: Brickwork, Ground Levels and Cavity Details

External clues point towards rubble‑fill or bridging damp when raised ground or paving sits close to floor or DPC level, low render or cement plinths trap water, weep holes are blocked, and rainwater goods or gullies concentrate wetting exactly where internal patches appear. When those features line up with the age of the building and known cavity types, rubble‑fill becomes a leading explanation rather than a background worry.
Every damp story has an outside component, and for rubble‑fill and bridging issues the external view is often where the most decisive clues sit. Once you have a picture of the internal symptoms, a slow, methodical walk around the exterior reveals how water reaches the wall, how long it is likely to sit there, and where it might be finding unintended paths inside.
Which external details make rubble‑fill or bridging more likely?
External details make rubble‑fill or bridging more likely when they keep the wall wet at the same heights and positions as your internal symptoms. You are looking for features that hold water against the wall or give it an easy route into cavities and cores that were never meant to stay saturated.
First, look at levels. External ground or paving that finishes very close to internal floor level or to the visible damp‑proof course creates a constant splashback and soak zone at exactly the height where early cavities often hold debris. Building control guidance on avoiding bridging of damp‑proof courses during refurbishment makes the same point: high paving and raised ground near DPC level keep masonry wet and increase the risk of bridging. Paths, patios and flower beds that have been raised over the years can end up bridging both the DPC and any previous attempt at damp‑proofing, leaving moisture nowhere to go but sideways into the base of the cavity or core.
Next, study the brickwork and detailing. Hard cement plinths at the bottom of walls, render carried down too far, or a complete lack of visible DPC all deserve attention. Weep holes that were intended to drain water from cavities may be blocked by paint, render, soil or plant growth. Localised repointing, brick replacement or patch repairs, especially close to ground level or below windows, hint at earlier trouble spots where rubble or mortar droppings could have collected.
Rainwater goods tell a parallel story. Downpipes that discharge too close to the wall, leaking joints, undersized or overflowing gutters, and gullies that back up during heavy rain can all deliver concentrated wetting to specific sections. Consumer advice from water industry bodies, such as guidance on preventing damp from outside taps and plumbing, gives similar examples of how localised discharge creates damp problems on external walls. If internal damp patches line up with these features, particularly on wind‑exposed elevations, the odds tilt further towards penetrating and bridging mechanisms involving rubble or debris.
Key external features that push you towards rubble‑fill or bridging include:
- Raised ground, paving or beds finishing close to floor or DPC level.
- Hard cement plinths, low render or no visible DPC near damp areas.
- Blocked or missing weep holes and history of patch repairs at low level.
- Leaking downpipes, overflowing gutters or saturated gullies beside damp rooms.
Once you have seen these patterns a few times, they become hard to ignore. They also explain why generic internal “damp proofing” often fails: if water is being fed into the wall from outside through rubble‑filled cavities or bridged details, internal coatings can only ever chase the symptom, not the source.
How do you connect outside clues back to internal damp?
You connect outside clues back to internal damp by tracing straight lines, matching heights and asking how long each part of the wall stays wet. Instead of seeing each stain or defect in isolation, you sketch an invisible path that water might be taking from sky to soil to brick to plaster. When that imagined route matches both internal and external observations, rubble‑fill or bridging moves from theory to a working explanation.
The key is to think in lines rather than isolated points. Take the internal sketch and photos you prepared earlier and stand in front of the matching external wall. Draw an imaginary line from the internal damp patch straight through to the face of the brickwork or stone, then look up and down that line for anything that might be feeding or holding water at that location.
A simple four‑step check outside
- Stand opposite each internal damp patch and trace an imaginary line through to the exterior.
- Scan above and below that line for raised levels, plinths, blocked weeps or rainwater faults.
- Note whether the area is especially exposed to wind‑driven rain or shaded and slow to dry.
- Ask whether any defect you see could keep that section of wall wet for long periods.
This simple loop quickly shows whether external defects genuinely line up with what you are seeing inside.
If the internal damp is near a corner, check whether the external corner is especially exposed to rain or shows signs of movement and cracking. If the internal stain is below a window, look for failed seals, cracked sills, missing drip details or changed pointing patterns just under the opening. In each case, ask whether the defect you see could be directing water onto a small area of wall that, behind the scenes, contains rubble or a cavity obstruction.
Finally, think about time and saturation. Some defects expose the wall to occasional splashes, others provide a near‑constant supply of moisture. Overflowing gullies, leaking external taps and irrigation systems that wet the wall every day can keep rubble and debris wet even when it has stopped raining, extending the period during which moisture is able to migrate across into the inner leaf. Where these sit close to known rubble‑filled or early cavity construction, the case for cavity bridging as a major player becomes strong.
By the end of this external check, most owners can place their property in one of three broad groups: low risk of rubble‑fill or bridging based on clean detailing and levels; moderate risk where some factors line up but symptoms are mild; and high risk where internal patterns and external defects match closely. At that point, contacting a specialist such as Sussex Damp Experts for a targeted cavity and ground‑level assessment usually makes more sense than either ignoring the problem or jumping straight to generic damp‑proofing.
Survey Levels 2 and 3: What They Can, and Cannot, Tell You About Rubble‑Fill

Level 2 and Level 3 surveys can tell you where damp is suspected and how serious it might be, but they cannot by themselves prove rubble‑fill or map cavity‑bridging in detail. Their comments should be read as cautious hypotheses about risk, not as final verdicts on the exact route moisture is taking through walls, cavities or rubble cores.
Survey reports are written to a template, and understanding that template is essential if you want to avoid either downplaying or overreacting to what is said about damp. In the United Kingdom, most buyers of existing homes will encounter either a Level 2 homebuyer survey or a more detailed Level 3 building survey. Surveying training material on standard RICS home surveys, such as this overview of Level 2 and Level 3 formats, describes these as the typical options offered to homebuyers. Both have explicit limits on what can be inspected, what can be opened up, and how far the surveyor is expected to go in diagnosing the exact cause of damp. The same training guidance emphasises that these inspection and opening‑up limits are built into the survey types, which is why they cannot provide a full damp investigation on their own.
In short, a Level 2 survey is a screening tool that flags risk and suggests further investigation where needed, while a Level 3 survey offers more space for commentary and may include limited intrusive checks. Neither is a full damp investigation, and neither is designed to map out rubble‑fill and cavity‑bridging in detail. The tools and approaches used in more detailed damp investigations are standard practice in UK building pathology, but they sit outside the scope of a basic homebuyer report.
Walls rarely fail for one reason; patterns matter more than labels.
How should you read damp comments in a standard homebuyer survey?
Damp comments in a homebuyer survey are best read as signposts saying “look more closely here,” not as labels that settle the cause in a single phrase. They describe where symptoms or readings were found and how those looked to the surveyor at the time, but they sit on top of clear limits about access, opening‑up and testing.
The limitations section is the logical starting point. It usually states that floors were not lifted, furniture and finishes were not removed, and report findings rely largely on visual inspection and simple instruments such as electrical moisture metres. RICS‑aligned training material on home surveys highlights the same caveats: standard inspections are restricted to what can be seen and safely accessed at the time. In a rubble‑filled or early cavity wall, those constraints mean the surveyor cannot see inside the wall or know whether the cavity is clear, partially filled or fully bridged.
When the damp section notes “elevated readings to lower walls” or “evidence of dampness consistent with rising damp,” that wording should therefore be read as “this pattern could be due to rising damp, but other mechanisms, including cavity bridging and rubble‑fill, remain possible and have not been ruled out.” Some surveyors will state explicitly that a specialist damp survey is recommended, while others will phrase it more gently, but the underlying message is the same: the current evidence does not justify a firm, cause‑specific label.
Three simple decoding habits help when you read damp comments:
- Treat “consistent with rising damp” as “one possible explanation, not proven”.
- Read “elevated readings” as “higher than expected here, but not a diagnosis”.
- Take “further investigation recommended” as a serious prompt, not a formality.
Level 3 surveys offer more room for description and, depending on the instructions and the surveyor’s expertise, may give a more nuanced view of how wall type, external detailing and moisture patterns interact. Even then, unless an agreement has been made for openings, sampling or cavity inspection, many of the questions that matter most for rubble‑fill diagnosis remain open. The report can, and should, highlight where further targeted investigation would be most useful.
When is it worth commissioning a specialist damp investigation?
It is worth commissioning a specialist damp investigation when wall type, visible symptoms and survey wording together suggest both a real risk and enough uncertainty that guessing could be costly or disruptive. In those cases, a focused, evidence‑led visit is usually cheaper and safer than living with the wrong label or agreeing to generic “damp proofing” that never touches the real mechanism.
The decision to commission a dedicated damp survey is a balance of cost, risk and timing. If a property is relatively modern, external detailing is sound, internal symptoms are minor, and the survey comments are cautious rather than emphatic, monitoring may be an acceptable first step. However, if the house is of an age and style likely to include rubble‑filled or early cavity walls, if low‑level damp is visible in several places, and if ground levels or rainwater management look questionable, the stakes are higher.
A simple way to think about it is:
- Low‑risk pattern: modern construction, clean detailing, minor marks, cautious wording → monitor first.
- Medium‑risk pattern: older walls, some external defects, repeated damp comments → consider targeted survey.
- High‑risk pattern: rubble‑likely walls, strong internal clues, poor levels or rainwater handling → arrange specialist inspection.
Buyers also need to consider lender and insurer expectations. Some will release funds on the basis of a general survey, while others expect a clearer separation between condensation, general penetrating damp and issues driven by bridging or ground moisture. Guidance on damp and mortgage lending, such as industry commentary from lender bodies, explains that how damp is categorised and documented can affect lending decisions, which supports the idea that clearer distinction between damp types is often expected. Where a mortgage valuation or underwriter queries damp, a detailed, evidence‑led damp report from a competent specialist can prevent generic “damp proofing” being imposed as a condition of lending.
A specialist visit from Sussex Damp Experts typically focuses on exactly the questions that a general survey cannot answer: what the wall is made of in detail, how cavities or cores behave, whether debris or insulation is present, how moisture levels change with height and position, and which external features are driving the problem. The output is a written diagnosis and phased repair plan that can be shared with solicitors, lenders and contractors alike, giving everyone a clearer basis for decisions.
Metres, Borescopes and Thermal Cameras: Joining the Dots, Not Guessing

Metres, borescopes and thermal cameras help you understand rubble‑fill damp when they are used to test clear ideas about moisture paths, not to “prove” generic rising damp from a few high readings. Patterns of profiles, images and internal inspections that match wall type, internal symptoms and external risks can confirm bridging or debris problems, while isolated numbers taken without context usually add confusion rather than clarity.
Modern damp diagnosis has an impressive toolkit, but the tools only add value when they are used to test hypotheses that come from understanding the building, not as shortcuts to avoid thinking. Rubble‑fill and cavity‑bridging problems are a prime example: electrical metres, borescopes and thermal imaging can all reveal important details, yet each can mislead if used in isolation or without appreciation of the underlying construction. These tools are standard in UK building pathology when damp is investigated in depth.
Thoughtful use of instruments is one of the main differences between a sales‑driven damp visit and a genuine diagnostic survey. Sussex Damp Experts, for example, uses metres and imaging to confirm or challenge what the fabric and history already suggest, not to chase work. The goal is to map how moisture is behaving so that the least intrusive, most effective remedy can be chosen.
How should moisture metres be used around rubble‑filled walls?
Moisture metres are most useful around rubble‑filled walls when you use them to build profiles along and up the wall, comparing affected areas with cleaner controls rather than relying on single “yes or no” checks at skirting height. Patterns that peak around suspected bridges or mid‑height zones, especially when floors remain relatively dry, point away from simple rising damp and towards bridging or debris‑driven mechanisms.
Quick, single‑point metre readings pressed into random areas of plaster are of very limited value, particularly on walls that may contain salts, metalwork or heterogeneous cores. The more useful approach is to create moisture profiles: a series of readings taken at defined intervals from floor level upwards on both affected and unaffected walls, and sometimes across the width of a wall. That pattern can then be compared to what would normally be expected from rising damp, pure condensation or a bridged cavity.
In rubble‑filled or early cavity construction, anomalies such as spikes in mid‑height readings, high readings immediately above a suspected bridge, or relatively dry readings at floor level beneath a damp patch all point away from simple capillary rise. These profiles do not prove rubble‑fill damp on their own, but they do indicate where further investigation should be concentrated and help to avoid blanket diagnoses.
Typical metre patterns that should make you think about rubble‑fill include:
- High readings at or just above window heads or cavity tray levels.
- A “band” of higher readings mid‑wall with lower readings at the skirting.
- Sharp spikes above suspected debris lines, with drier zones directly below.
Seen together, these profiles encourage you to treat the metre as a mapping tool, not a verdict machine.
It is also essential to remember that most common metres are calibrated for timber, not masonry. Independent damp inspection guidance, such as this explanation of rising damp testing limitations, stresses that electrical moisture metres must be interpreted cautiously on masonry and plaster. Figures and coloured scales on the display should therefore be treated as comparative indicators, not absolute percentages. That is another reason an experienced specialist such as Sussex Damp Experts focuses on patterns and context, not on the raw numbers alone.
When do borescopes, thermal imaging and lab tests add real value?
Borescopes, thermal imaging and occasional lab tests add real value when they are used to answer specific questions about what is inside the wall and how moisture is moving, especially in older or cavity construction where rubble‑fill and bridging are suspected but not yet confirmed. Each tool has a clear “best job,” and planning around that job avoids unnecessary openings and wasted effort.
Borescopes and endoscopes allow visual inspection inside cavities or cores through small holes, usually drilled in mortar joints rather than through bricks or stones. In the context of suspected rubble‑fill or bridging, they can confirm the presence of mortar droppings, rubble, slumped insulation or even standing water at the base of cavities. Because every opening creates a repair task, planning where to place them is critical; a handful of well‑chosen inspection points is usually enough.
Thermal imaging adds another layer by showing temperature differences on internal or external surfaces. Cold, damp areas often appear distinct from warm, dry ones, and when those cold spots line up with defects, exposed elevations or known cavity features, they strengthen the case for a particular moisture path. Combined with short‑term logging of temperature and relative humidity, thermal surveys can also help distinguish between fabric‑driven damp and occupancy‑driven condensation.
Where legal disputes, warranty claims or very large sums of money are involved, laboratory tests such as gravimetric or carbide analysis of sampled material may be justified. These methods measure actual moisture content and, in some cases, salt composition, providing a higher level of certainty about whether true rising damp is present. Building pathology guidance on gravimetric moisture testing explains how these techniques assess both moisture content and salt distribution in masonry, which is why they are so useful in complex rubble‑filled walls. In rubble‑filled walls, they are particularly useful for separating the effects of historic contamination from current liquid water movement.
Used together, these tools create a joined‑up picture:
- Moisture profiles show where readings change with height and position.
- Borescopes reveal whether cavities or cores are clear, bridged or water‑holding.
- Thermal imaging highlights cold, damp‑biassed zones linked to defects and exposure.
Instrument data is most powerful when it is organised and explained. Annotated photographs, moisture maps and brief explanations of what each test shows, and what it does not, give owners, buyers and professionals a common language. This is one reason Sussex Damp Experts places as much emphasis on clear reporting as on the testing itself; without that clarity, numbers and images can quickly become more confusing than helpful.
Avoiding Classic Survey Mistakes and Misdiagnosis

You reduce the risk of rubble‑fill damp being mislabelled as rising damp by refusing to rely on single metre readings, by treating wall construction as central rather than incidental, and by insisting that any specification explains which moisture paths are being cut and why. A simple, repeatable framework that forces you to ask how the wall is built, how water reaches it and how symptoms line up will save far more money than any generic promise to “damp proof” everything.
Many of the most expensive damp failures stem not from complex defects but from simple patterns of thinking that were never questioned. In the context of rubble‑fill and cavity‑bridging, the biggest trap is the assumption that any low‑level damp on an external wall must be rising damp that needs chemical injection, regardless of age, wall type or external context.
Breaking out of that mindset means changing habits rather than relying on one‑off clever insights. Simple questions about how a wall is built, how water reaches it and how symptoms move over time do more to protect your budget than any quick sales pitch promising to cure “rising damp” everywhere at once.
Which habits most often lead to rubble‑fill being misdiagnosed?
Rubble‑fill is most often misdiagnosed when people lean on quick metre sweeps, downplay wall construction and write blanket specifications that chase symptoms instead of defined moisture paths. Recognising these habits in your own decisions is the first step towards a more disciplined approach.
The first unhelpful habit is relying on a quick pass with a moisture metre as if it were a definitive diagnostic tool. Without moisture profiles, knowledge of construction, and cross‑checks against internal and external patterns, single readings invite confirmation bias: once a surveyor expects to find rising damp, any high reading at low level is likely to be interpreted as supporting that expectation.
The second is treating wall construction as incidental detail rather than the foundation of any diagnosis. In a modern, well‑built cavity wall with good drainage and clear cavities, true rising damp is rare and a clean DPC is usually effective. Independent inspection guidance on damp diagnosis, including critical reviews of rising damp claims, repeatedly notes that when modern cavities are built and detailed correctly, genuine rising damp through them is uncommon. In rubble‑filled or poorly executed early cavities, by contrast, the behaviour of moisture is dominated by internal bridges, debris and uneven paths. Failing to adjust thinking for those differences almost guarantees mislabelling.
A third habit is writing specifications that aim to “damp proof” everything in sight without clearly articulating which moisture paths are being interrupted and how. As already noted when looking at external evidence, tanking entire lower walls internally or injecting every metre of masonry often hides rubble‑fill paths and external wetting rather than addressing them, making later diagnosis and repair more difficult.
In practical terms, the three traps look like this:
- Relying on quick, low‑level metre sweeps instead of structured moisture profiles.
- Treating wall type, age and cavity form as side notes rather than central evidence.
- Writing “cover everything” specifications that hide rubble‑fill paths instead of cutting them.
Once you see these traps in real cases, it becomes easier to pause and ask better questions before committing to work.
How can a more structured approach reduce misdiagnosis and waste?
A more structured approach reduces misdiagnosis and waste by forcing every damp decision to pass through the same checks: what the wall is made of, how moisture gets to it, how symptoms behave, and which specific paths each proposed treatment will interrupt. Once those questions are answered, rubble‑fill and bridging either stay on the shortlist or fall away for clear reasons, rather than being guessed at or ignored.
Replacing unhelpful habits with a structured, repeatable approach makes each new case easier rather than harder. A simple framework might look like this: identify wall type and age; map internal symptoms; map external defects and levels; consider occupancy and condensation; collect basic instrument data; then generate and test a small number of possible mechanisms rather than jumping straight to one label.
A straightforward five‑step sequence works well:
- Confirm wall type, age and likely cavity or core form.
- Map internal symptoms by height, width, location and timing.
- Map external levels, detailing and rainwater handling against those internal areas.
- Build moisture profiles and, where justified, plan limited openings or imaging.
- Choose treatments that clearly cut identified moisture paths, not just cover damage.
For landlords and portfolio owners, building this framework into inspection templates and repair workflows provides a further benefit: an audit trail. Best‑practice resources on inspection checklists and technical survey forms emphasise that structured templates make it much easier to demonstrate how issues were assessed and why given actions were chosen, which is exactly what you need when decisions are later questioned. When complaints arise or inspections are challenged, a documented record of how each damp issue was assessed, what was found about construction and context, and why certain works were chosen is far more persuasive than vague recollection that “there was some damp so we treated it.”
At an individual property level, owners and buyers can use the same mindset in a lighter way. Reading survey comments with a view to mechanisms rather than labels leads to more focused questions, more targeted specialist visits, and fewer sweeping solutions. When rubble‑fill or bridging is on the list of possibilities, requesting that it be explicitly considered, investigated or ruled out is a reasonable, informed step, not an overreaction.
Specialists also have a role to play. Sussex Damp Experts, for example, has deliberately shaped its practice around diagnosis rather than product‑led treatment. That means being prepared to say when a problem is small and best monitored, when simple external works will deliver most of the benefit, and when more intrusive cavity or core investigations are justified. Sharing case studies and lessons from misdiagnosed jobs with surveyors and landlords helps raise the standard of decisions collectively, not just one property at a time.
Book Your Consultation With Sussex Damp Experts Today

Booking a consultation with Sussex Damp Experts gives you a clear, evidence‑led view of whether rubble‑fill, cavity bridging or another mechanism is behind your damp, and turns confusing survey comments and worrying damp patches into a practical, staged repair plan you can share confidently with surveyors, lenders and contractors. Instead of generic “rising damp” labels and one‑size‑fits‑all treatments, the surveyors look at wall construction, internal patterns, external detailing and instrument data together so the mechanism is properly understood, and you gain a diagnosis that fits your property along with a sequence of works matched to risk and budget.
What happens during a Sussex Damp Experts consultation?
A typical consultation starts with your existing information: any survey reports, photographs, historic paperwork and your notes about when and where symptoms appear. That material is used to plan a site visit that concentrates on the areas most likely to reveal how the wall is built and how moisture is moving, so time on site is spent diagnosing, not just re‑describing what you already know. Where appropriate, carefully planned moisture profiling, borescope inspection or thermal imaging is used to confirm or rule out rubble‑fill and cavity‑bridging as primary causes.
The output you receive is more than a list of damp locations. Reports aim to set out the likely mechanisms in plain language, show how each conclusion is supported by what was seen and measured, and present repair options in phases. Trade and association guidance on clear damp reporting describes this phased, plain‑language approach as best practice, and Sussex Damp Experts structures its reporting with that standard in mind. External drainage and levels, cavity or core interventions, and internal finishing are sequenced so that the most cost‑effective, least disruptive steps come first, and more extensive works are only recommended where the evidence justifies them.
How does Sussex Damp Experts support you after the visit?
Sussex Damp Experts supports you after the visit by helping you use the findings to make better decisions, whether you are negotiating a purchase, planning works on a home you already own or managing a portfolio of properties with repeated damp issues. Clear documentation and follow‑up give you the confidence to push back against vague recommendations and to brief contractors accurately.
Clear documentation is part of the service. Photographs, annotated diagrams and moisture profiles are organised so that surveyors, solicitors, lenders and contractors can all see the logic. That clarity helps with negotiations on price, with satisfying lender conditions, and with instructing trades in a way that avoids over‑specification or missed defects.
Follow‑up is also built in. For higher‑risk properties, Sussex Damp Experts can schedule check‑ins after key stages such as groundworks, cavity clearance or internal reinstatement, revisiting earlier patterns to confirm that moisture levels and visible symptoms are moving in the right direction. This gives owners, buyers and landlords tangible reassurance that the damp story is changing, not just being covered up.
Bringing surveys, on‑site evidence and expert interpretation together in this way turns rubble‑fill and cavity‑bridging damp from a vague fear into a defined problem with clear options. If you are looking at a property in Sussex where damp and rubble‑fill have been mentioned, or if you own one where “rising damp” treatments have failed to bring lasting relief, a consultation with Sussex Damp Experts is a straightforward step towards understanding what is really happening inside the walls and what to do about it.
If you value careful, evidence‑led diagnosis for Sussex walls rather than quick‑fix labels, Sussex Damp Experts is a natural first call.
Frequently Asked Questions

How can I tell from my survey if damp is from rubble‑fill or true rising damp?
You’re usually looking at rubble‑fill or bridging when the damage is messy, localised and tied to particular wall features, and closer to true rising damp when it forms a fairly even band that tracks the floor level and any visible damp‑proof course.
What does a genuine rising damp pattern look like on paper and in photos?
On a well‑recorded survey, rising damp tends to behave in a very simple, predictable way:
- A continuous strip of damage climbing from floor level, typically worst at skirtings.
- Similar heights and symptoms on walls that are in direct contact with the ground.
- Moisture readings that are highest low down and fade steadily with height when plotted.
Wording such as “consistent with rising damp” only really stands up when that steady gradient, the photos and the wall type all agree, and when the surveyor has already ruled out obvious bridges such as raised paths, buried plinths or leaking plumbing.
What patterns push the diagnosis towards rubble‑fill or cavity‑bridging instead?
Rubble‑fill and bridging usually break that tidy “tide mark” rule. Internally you are more likely to see:
- Broken or irregular low‑level patches: that never join into one clean band.
- Narrow vertical columns under windows, at chimney flanks or in corners.
- Isolated mid‑height patches with sound plaster above and below.
- Report notes mentioning “random stone”, “rubble infill”, “filled cavity” or “early cavity wall construction”.
If a previous chemical DPC is on record but the same limited areas still show salts, hollow plaster and tired skirtings, that is a strong hint that the real issue lies in the wall build‑up rather than a missing damp‑proof course. When those internal patterns match the age of the property, the wall construction and any raised external ground, you are usually looking at a construction and drainage problem first and a moisture label second.
If you are trying to decide what to do next, sharing the survey and photos with a specialist team such as Sussex Damp Experts is often the quickest way to turn a fuzzy “rising damp” line into a clear, evidence‑backed explanation you can plan around.
What internal wall clues suggest rubble‑fill or bridging rather than simple condensation?
You are more likely facing rubble‑fill or bridging when the damage stays fixed to the same spots in the wall fabric, while condensation damage tends to move with how you heat, ventilate and furnish the room.
How do rubble‑fill and bridging usually show up inside?
As you walk each room, pay close attention to height, shape and texture:
- Patchy, column‑like staining at low level, often beneath windows or in corners, rather than a neat strip all round.
- White or fluffy salts, crumbling skim and plaster that sounds hollow or drummy when tapped.
- Narrow zones where the worst damage sits at one height, with noticeably drier wall just above and below.
Those are strong clues that moisture is tracking through debris in the core, a bridged cavity or a permanently cold, saturated section of wall, instead of simply sitting on the paint after steamy showers.
What patterns point more towards everyday condensation instead?
Condensation behaves very differently because it is driven by air and surface temperature:
- It appears above radiators, behind big furniture and in cold external corners, especially near ceilings.
- It typically shows as black or dark grey mould and clammy paint rather than white salts and friable plaster.
- It shifts with your routine – worse after showers, clothes drying indoors and windows shut, better after a week of steady heating and sensible ventilation.
A simple sketch for each room, marking where damage sits, how high it reaches and what tends to make it worse (storms versus heavy bathroom use), helps you see patterns clearly. Fixed low‑level bands that ignore your lifestyle are exactly the sort of evidence a good damp surveyor – and a firm such as Sussex Damp Experts – will treat as a construction or bridging problem, not a lifestyle judgement, before recommending any intrusive work.
Which external details make rubble‑fill or cavity‑bridging damp more likely?
Any external detail that keeps the base of the wall wet or stops a cavity draining freely increases the chance that your damp is tied to rubble‑fill or bridging rather than straightforward rising damp.
What should you check at ground level and along the wall base?
Take the survey outside and trace the same elevations on foot:
- Raised soil, patios, paths or decking: that sit close to, or above, internal floor level or any visible DPC line.
- Hard cement plinths, render or coatings running right down to paving without a gap.
- Missing, blocked or painted‑over weep holes on cavity walls.
- Low‑level patch repairs or horizontal strips that suggest an old damp issue has been covered rather than fixed.
Those details either trap water against the wall or clog the drainage path in the cavity, turning what should be a drained gap into a solid bridge straight through to the inner leaf.
How do rainwater and services feed rubble‑fill and bridging problems?
Follow every practical route water can take:
- Tired gutters, leaky downpipes and overflowing gullies that soak the same section of wall after rain.
- Short or missing splash pads beneath outlets and rainwater pipes.
- Garden taps, hose reels and irrigation points that regularly drench one area of masonry.
If your worst internal staining mirrors those external weak spots, and the house dates from an era of early cavities or rubble‑core walls, another round of injections is unlikely to be the whole answer. That is the time to think about reducing exposure at that wall base and, where realistic, clearing or isolating any debris in the cavity. Sussex Damp Experts will generally start by mapping this outside picture against the internal damage before talking about any long‑term repair.
How much weight should you give moisture‑metre readings in rubble‑filled or early cavity walls?
Metres are useful for spotting patterns, but in rubble‑filled or early cavity walls single “high” readings can mislead because salts, backing coats and hidden metal can all push the numbers up without meaning the wall is saturated.
Why do moisture‑metre readings go wrong on complex wall builds?
Most handheld metres are tuned for timber rather than mixed masonry. On older walls they often:
- Respond strongly to salts, metal fixings and dense backing coats, not just free water.
- Jump from “dry” to “very wet” over a short distance as they pass over different materials.
- Really only tell you “wetter than this point, drier than that one”, not a reliable percentage.
In a rubble‑filled or early cavity wall, the probes may bridge plaster, brick, voids and debris at the same time, so the display reflects that mixture rather than a simple gradient.
How can you still get useful information from a moisture metre?
Treat the metre as a way to build a profile, not as a pass–fail device:
- Take readings at regular intervals, for example every 100 mm from floor level upwards on an affected patch.
- Repeat the same pattern on a nearby, similar wall that appears sound.
- Compare how the readings change with height and from panel to panel.
With true rising damp you expect a clear high‑near‑the‑floor, lower‑as‑you‑go‑up pattern, and similar maximum heights on linked walls. With bridging or debris you often see a narrow spike at a particular level – for example just above an external path or render band – or a single column of higher readings under a window while the next panel stays lower.
When those profiles are combined with borescope views, thermal images and, where it adds value, laboratory salt analysis, the metre becomes a useful part of a wider diagnosis rather than a gadget used to justify a one‑size‑fits‑all treatment. That is the kind of measured approach Sussex Damp Experts use when they are asked to make sense of conflicting moisture readings on complex wall constructions.
When is it sensible to call in a specialist instead of just watching rubble‑fill‑type damp?
It is sensible to involve a specialist when the property type, survey wording and visible symptoms all hint at a construction‑related damp problem and the outcome matters for your finances, health or legal position.
Which situations justify moving from “watch and see” to “get a proper survey”?
Paying for a focused investigation is usually worthwhile when:
- The report mentions random stone, rubble cores, early cavity walls or filled cavities.
- Irregular low‑level damp appears in several rooms rather than one isolated corner.
- External checks reveal raised ground, hard plinths, tired gutters or doubtful downpipes.
- A sale, purchase, remortgage or tenant complaint hangs on getting the diagnosis right.
In those settings, guessing or leaning on a generic injection quote can cost far more than commissioning an evidence‑led survey that separates rubble‑fill, bridging, plumbing leaks and condensation cleanly.
What should a good specialist actually deliver in a rubble‑fill‑type case?
On a well‑run visit you should expect:
- Confirmation of wall type, age and cavity condition, not just a catch‑all label such as “rising damp”.
- Moisture profiles taken in sensible locations, not random pin tests wherever the metre beeps.
- Checks on external levels, drainage and rainwater handling around each affected zone.
- Selective use of borescopes or thermal imaging where the wall build‑up or cavity condition is unclear.
The output should be a clear written diagnosis and a phased plan that you can share with surveyors, solicitors, lenders and trades. That way everyone works from the same evidence rather than assumptions, and you can phase practical first steps instead of being pushed into heavy internal stripping or whole‑house injections that do not address the real cause.
How can Sussex Damp Experts turn confusing rubble‑fill comments into a clear action plan?
Sussex Damp Experts focus on joining the survey language, the way your walls are built and what you are actually seeing day to day into one plain‑English plan, so you know what is happening, what really matters and what to tackle first.
What does the Sussex Damp Experts process typically involve?
The help usually runs through three practical stages:
- Desk review – Your existing survey, photographs and any older reports are checked for clues about age, wall construction, past work and likely moisture paths, including where phrases such as “rising damp” do not fully match the evidence shown.
- On‑site investigation – The team confirms how the building is put together, measures levels, looks at drainage and rainwater handling, profiles moisture where it matters and, where justified, uses borescopes or thermal imaging to see what is happening inside the wall rather than guessing from surface readings alone.
- Structured report and next steps – You receive a report that explains the most likely mechanism (rubble‑fill, bridging, plumbing, condensation or a mix), ranks the risks and sets out a phased repair sequence from straightforward external adjustments through to any cavity or internal work and final making good.
That kind of survey‑led approach makes it much easier to speak calmly and confidently to surveyors, lenders, managing agents and contractors about what is necessary and proportionate, instead of feeling steered into a generic “damp proofing” package. If you would rather move from worrying about a few unclear lines in a report to feeling in control of a long‑term moisture strategy for a Sussex property, asking Sussex Damp Experts to review your paperwork and carry out a targeted damp survey is often the most direct way to protect both your building and your budget.

